Quick Guide

Welcome!

Thank you for choosing the MyotonPRO palpation device for your research. Whether your research focuses on biomechanics, physiotherapy, sports science, or rehabilitation, the MyotonPRO is designed to support your pursuit of scientific innovation and excellence.

The device measures the following parameters of soft biological tissues:

  • Tone or State of Tension
  • Stiffness
  • Decrement
  • Mechanical stress relaxation time
  • Ratio of relaxation and deformation time

Support

Quick guide

This quick guide provides essential instructions for software and device setup, enabling you to begin your measurement collection efficiently.

User manual

For detailed instructions on ensuring reliable measurement results, please refer to the User Manual. You can also access the User Manual on the main toolbar of the Myoton Desktop Software.

Helpdesk

If you have any questions, need assistance, or require additional resources, please contact us via email at [email protected]

Equipment

To perform measurements, you will need the following equipment:

  • MyotonPRO Digital Palpation Device. For conducting measurements.
  • Myoton Desktop Software. For preparing measurements, uploading/downloading data, storing, and exporting results.
  • USB Cable. For transferring data between the Device and Desktop Software.
  • Medical Skin Marker. To mark the measurement point (MP) on the Subject’s skin.

Myoton Desktop Software

Establishing connection

Establish a connection between the Device and the Desktop Software:

  1. Open the Software on your computer.
  2. Turn on the Device. If the battery is below 20%, charge before use.
  3. Connect the Device to your computer using the USB cable.
  4. Ensure the Device’s serial number appears in the lower-left corner of the Software.

On a Mac computer, if the serial number does not appear automatically, restart the Software.

Software User Interface

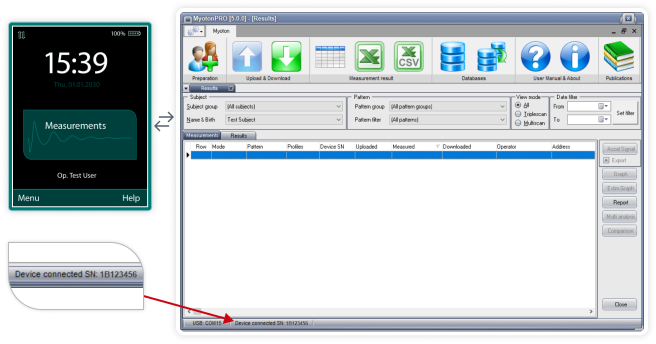
At the top of the screen, you will find the main toolbar containing the primary function buttons.

  1. Click the Upload Preparation button, to prepare a Measurement Set.
  2. Locate the Subject (top) and Pattern (bottom) sections on the screen. Here you can set up measurement details.

TERMINOLOGY USED IN THE DEVICES AND SOFTWARE

  • Subject – the person being measured
  • Pattern – the measurement protocol, including Objects and their profiles
  • Object – the tissue of interest
  • Operator – the person performing the measurements

Measurement Preparation

In the software

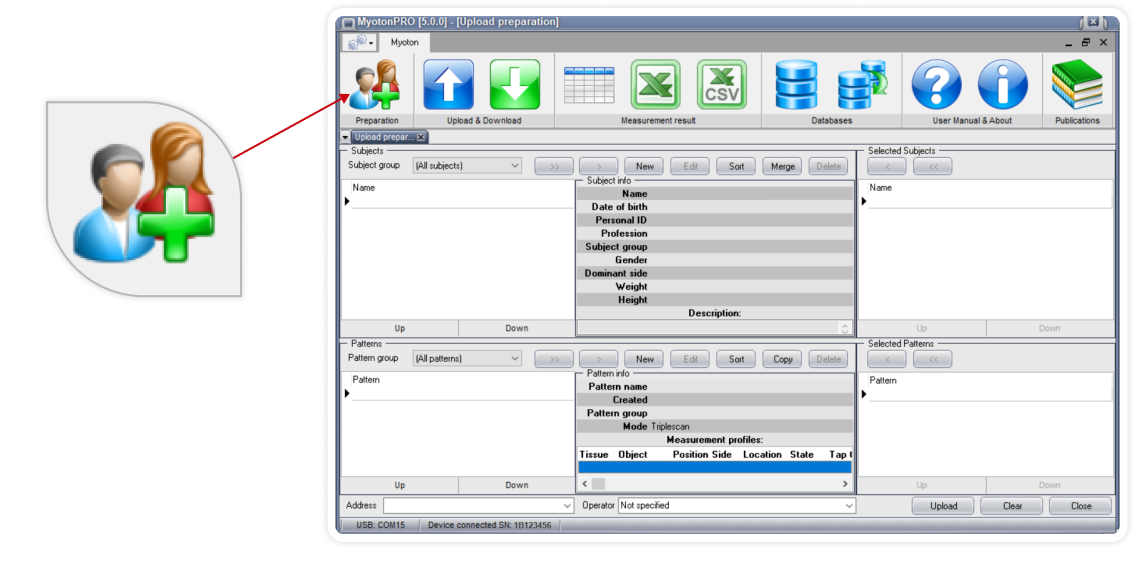
Measurement set preparation

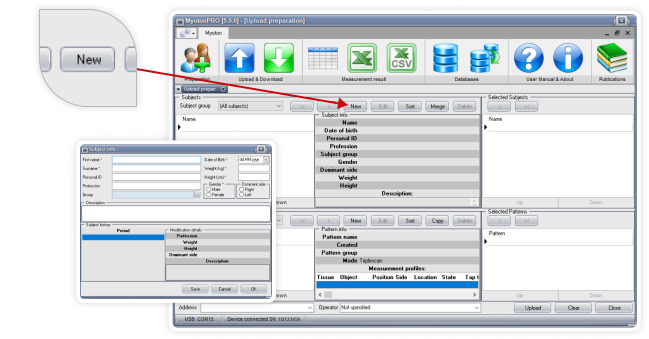
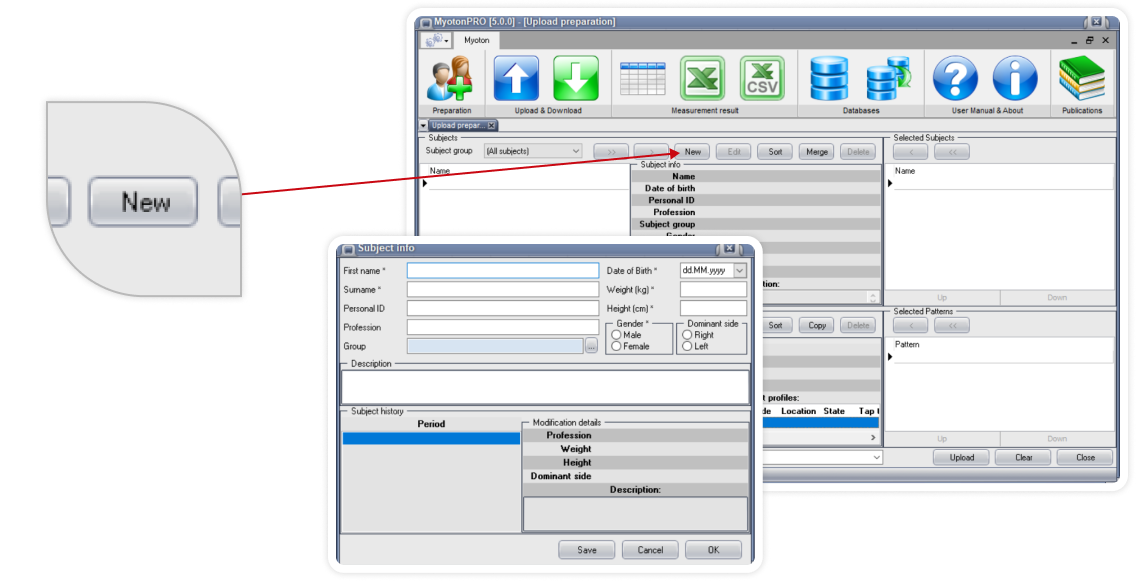
1. Enter the Subject

In the Subjects section

  • Click New and enter the Subject’s details.
  • Click Save to save the Subject and OK to close the window.

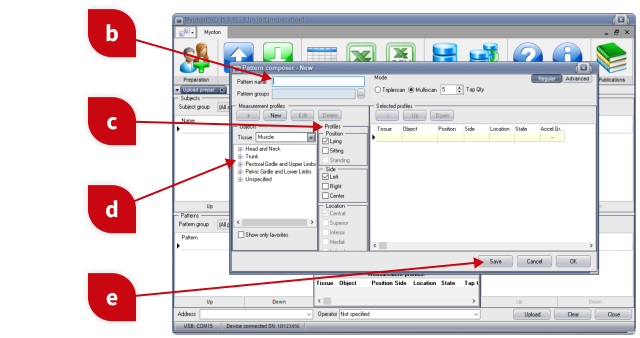
2. Compose the Pattern

In the Patterns section

  • Click New.
  • Enter the Pattern name.
  • Select Measurement Profile.
    • Position
    • Side
  • Select an Object by double-click.
  • Click Save and then OK.

Create the Measurement Set

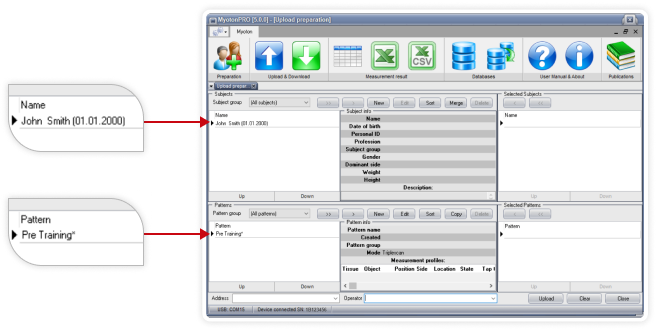
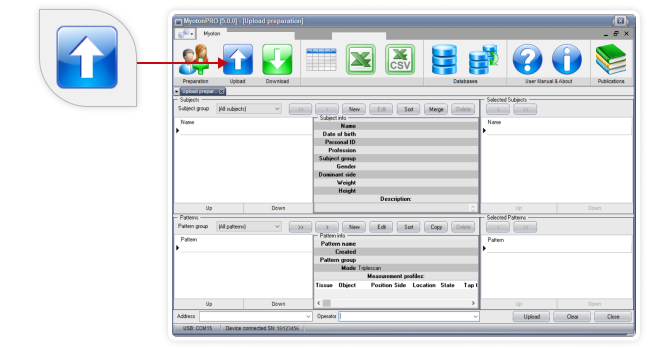
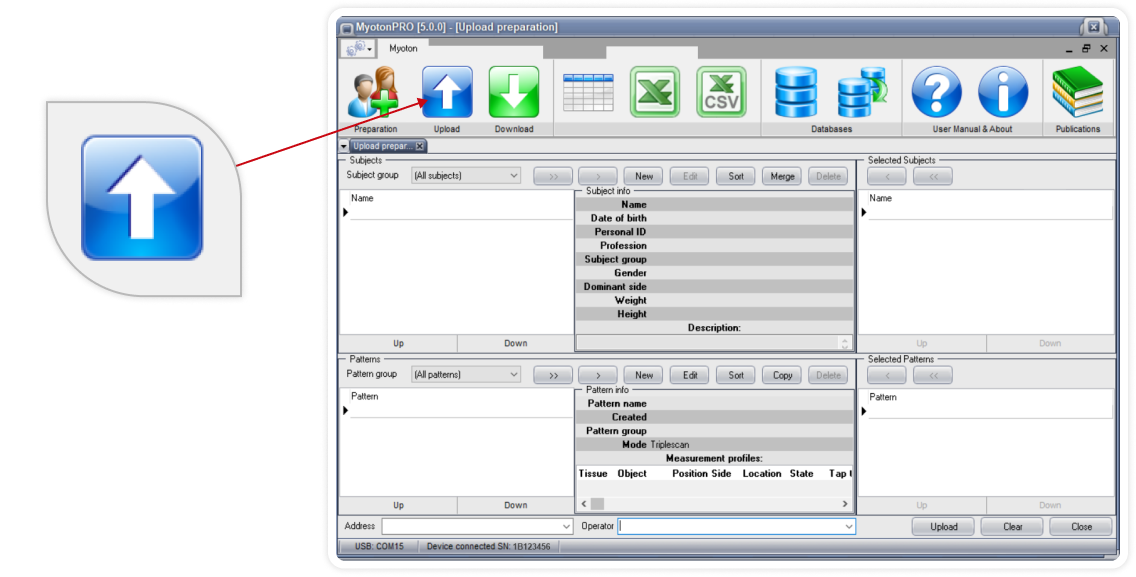
Double-click on at least one Subject and one Pattern name.

Moving them to the right section makes them ready for upload.

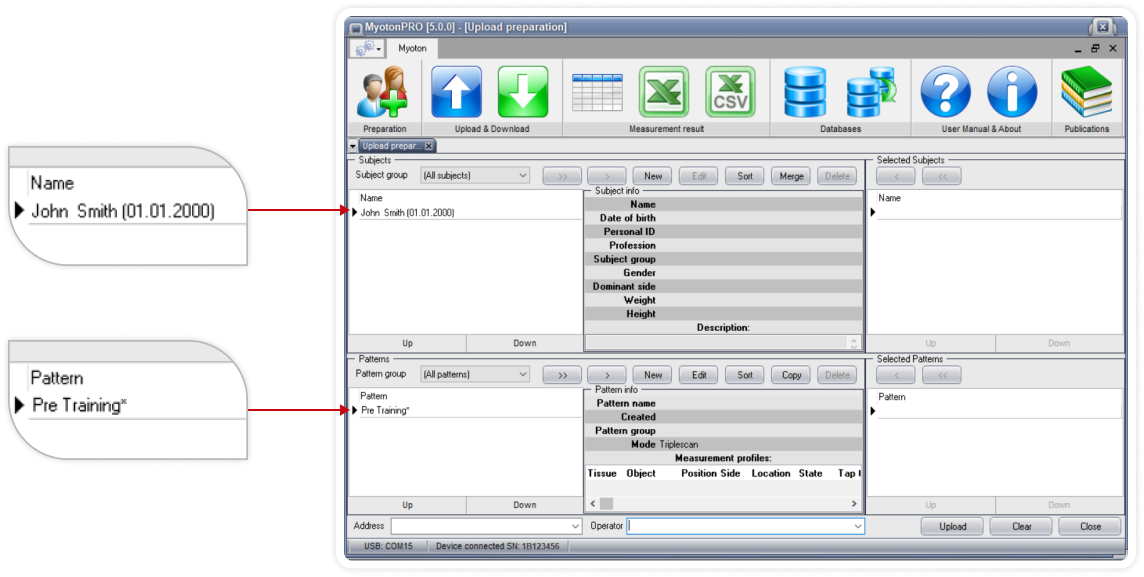
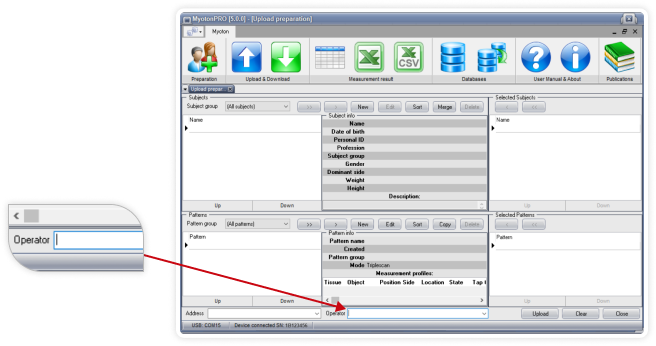
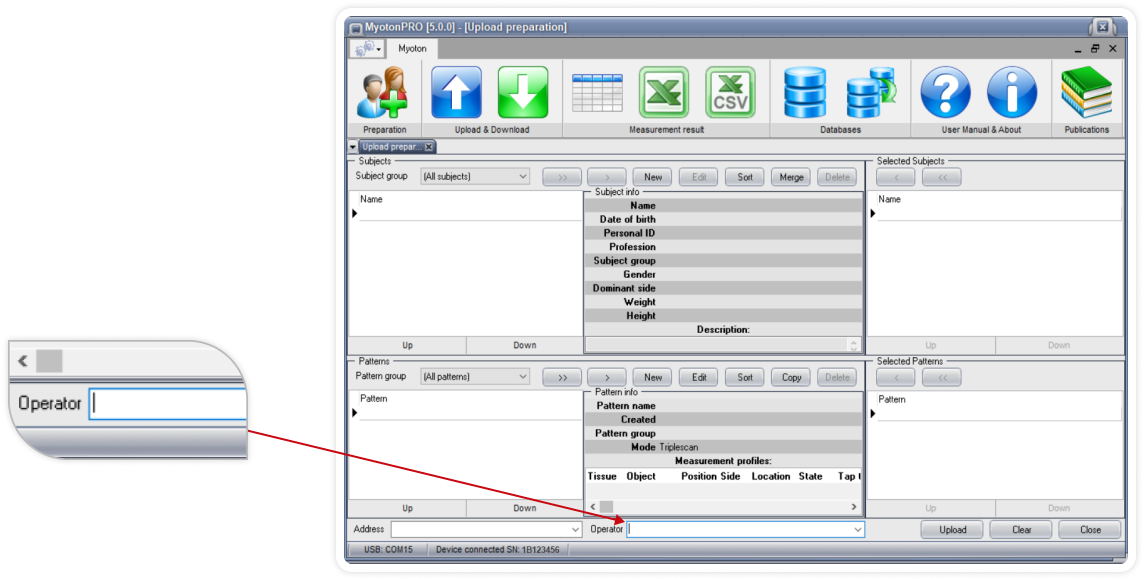
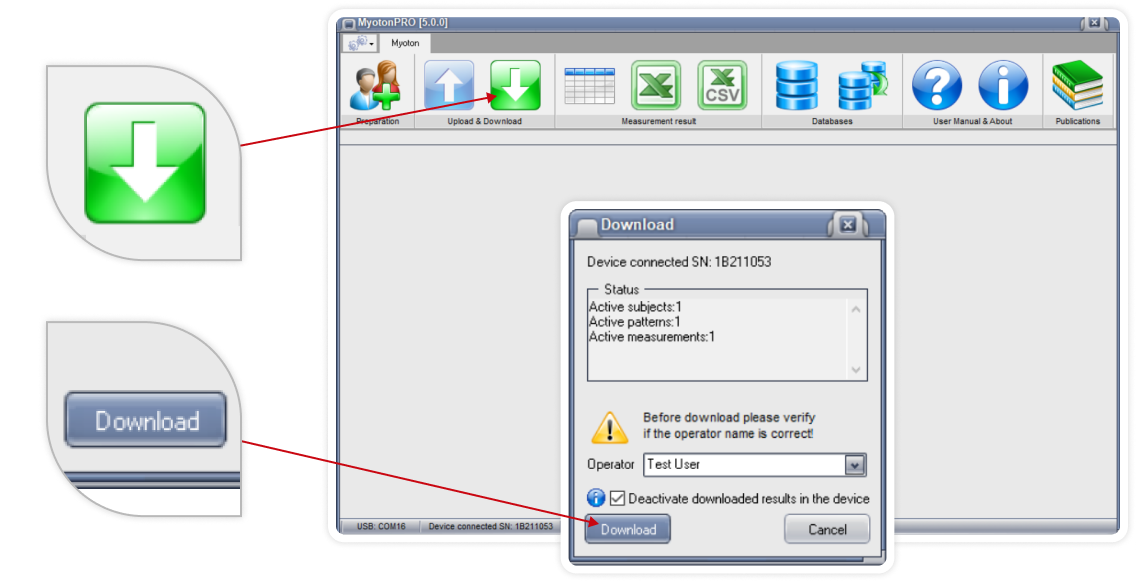
3. Enter the Operator Name

At the bottom of the screen, enter the name of the Operator.

In the Software UPLOAD

  1. Upload the prepared Measurement
  2. Set from the Software to the Device.
  3. In the Software, click the Upload button on the toolbar or in the lower-right corner of the screen.

On the Device DISCONNECT

After uploading the Measurement Set, unplug the USB cable from the device to disconnect it from the computer.

With the Subject

MEASUREMENT POSITION AND SITES

  1. Position the subject comfortably on the examination table. For consistency across measurement sessions, ensure the same body position is maintained.
  2. Using the Skin Marker, precisely mark the MP on the Subject’s skin directly above the tissue of interest, following the Measurement Profile.

Measurement

ACTIVATION

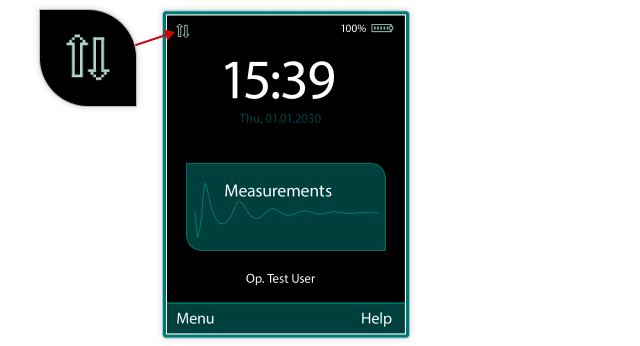
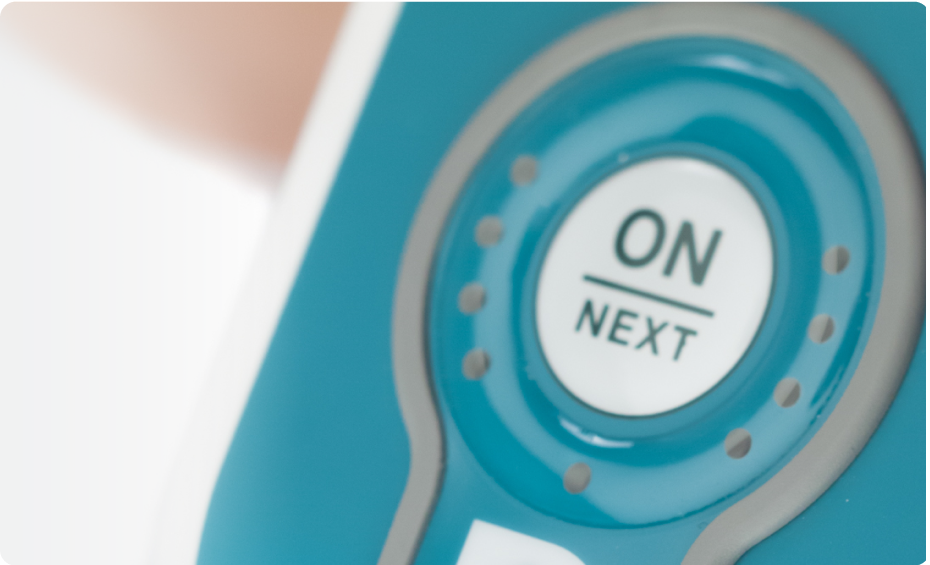
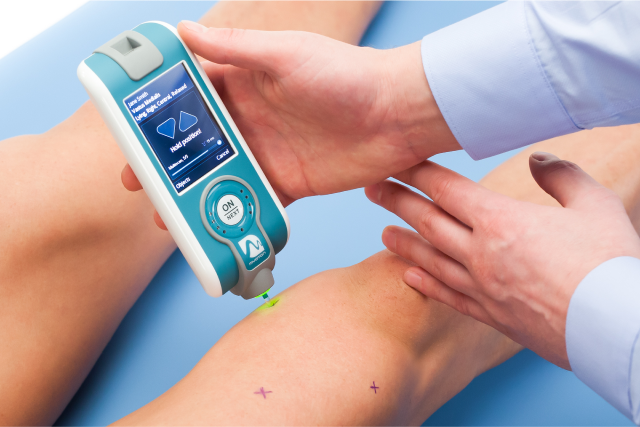
Press the ON/NEXT button four times to select Measurement, Subject, and Pattern, and to activate the new measurement.

If multiple Subjects or Patterns are in the Measurement Set, tap “Measurements” on the screen, select the Subject and Pattern, and then tap “Perform new measurement”.

DEVICE POSITIONING

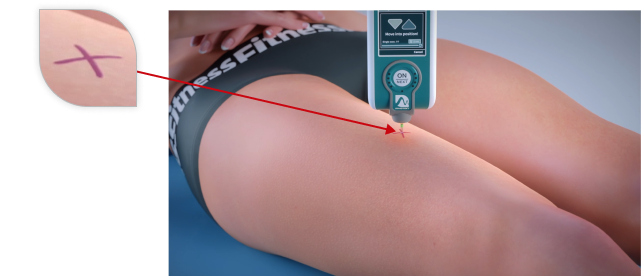
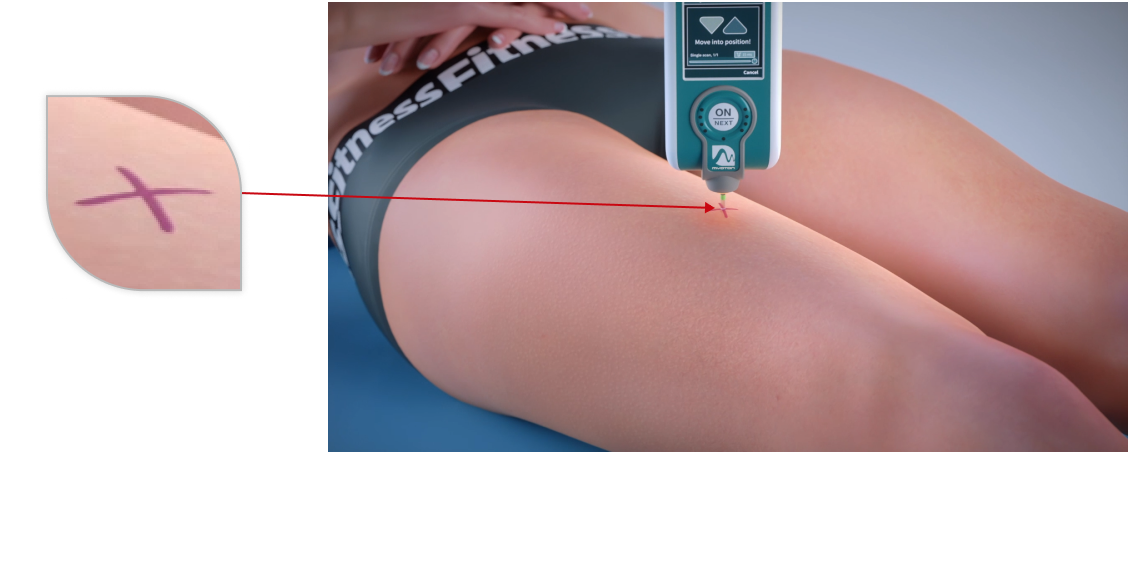
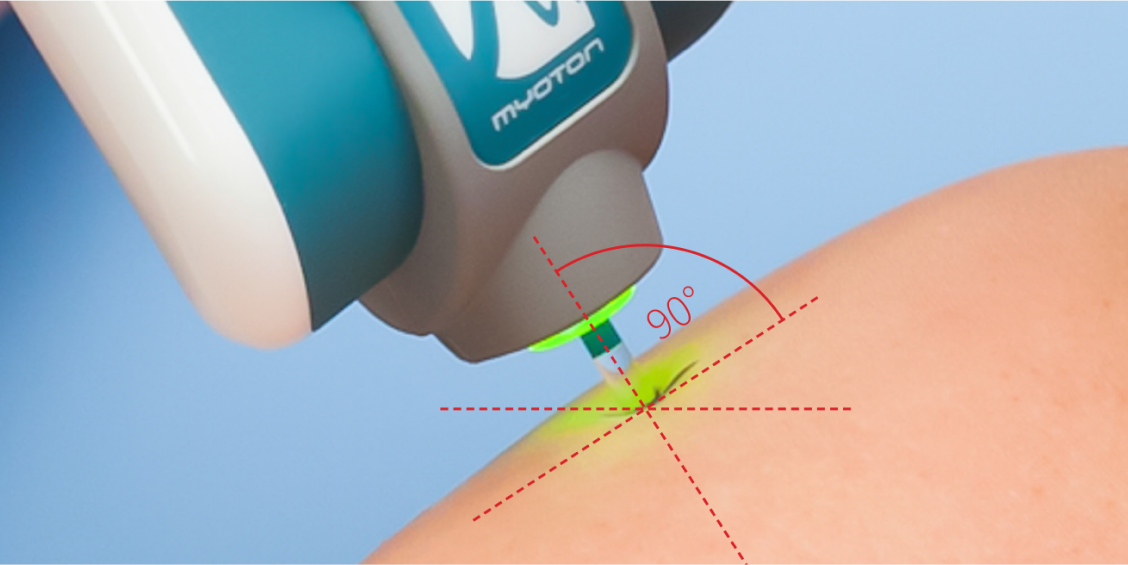
Position the probe directly on the pre-marked measurement site, ensuring it is perpendicular to the skin.

Hold the device gently with your dominant hand, using your other hand to provide support for axial stability.

Maintain a steady measurement position and make fine adjustments with your wrist as needed.

MEASUREMENT EXECUTION

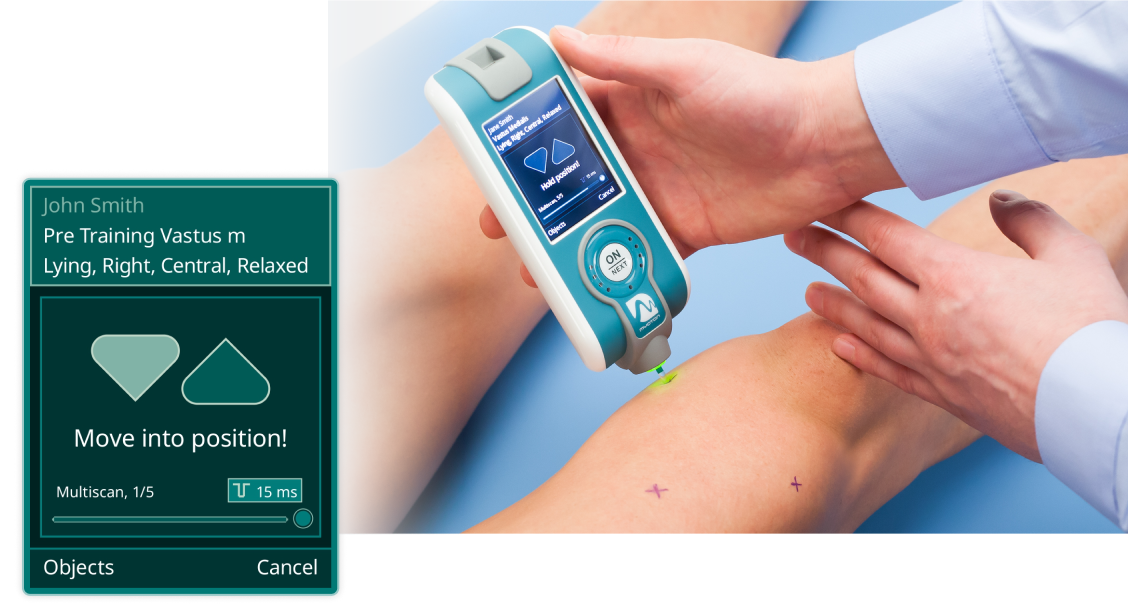
Place the probe on to the MP and perpendicular to the skin surface.

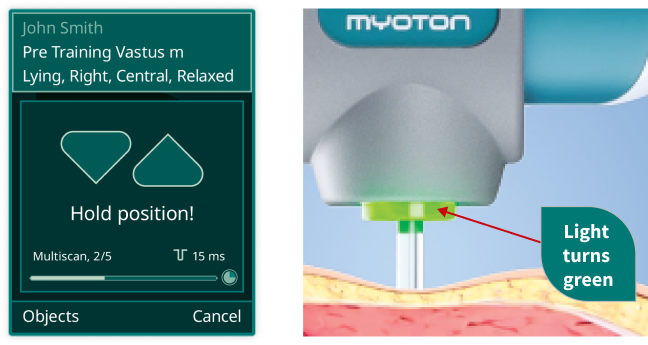
Slowly move the Device towards the skin, using the green marker on the probe as a guide for axial movement. When the orange light turns green, the measurement will begin automatically. Hold the Device steady in the measurement position until the measurement series is complete.

If the orange light stays on, follow the instructions on the Device screen:

  • Move into position” if the Device is too far from the skin.
  • Move back” if the Device is too close to the skin.
  • Rotate” the device around the probe axis if it is tilted too much to the side until the notification disappears. Ref. User manual page 18.

Measurement Results

On the Device VERIFICATION

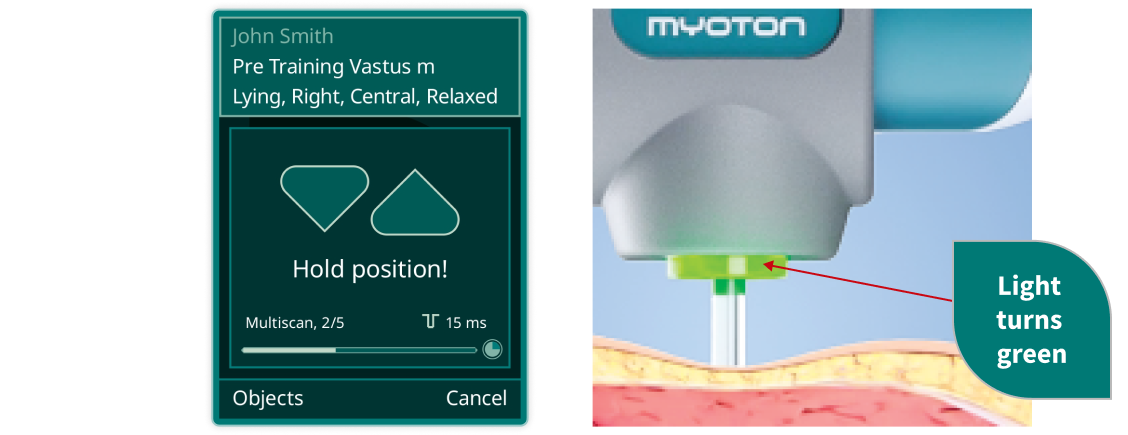
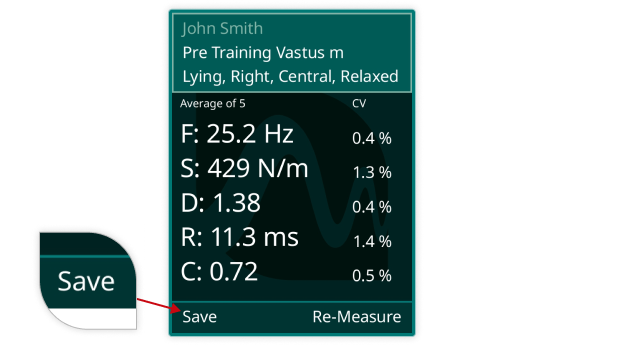
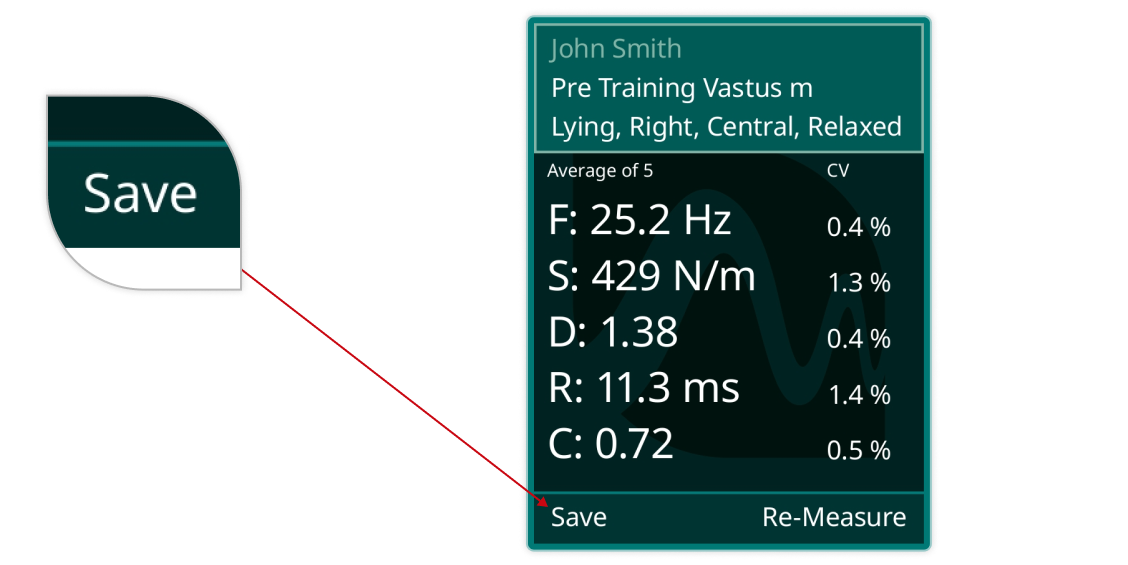
After the measurement is complete, the Device displays the results and the coefficient of variation (CV).

CV for the parameters of interest should be below 3%.

  1. If necessary, tap “Re-measure” to repeat the measurements.
  2. Tap “Next” to proceed with remaining measurements.
  3. When all measurements are completed, tap “Save” to save the results and “Finish” to return to the main screen.

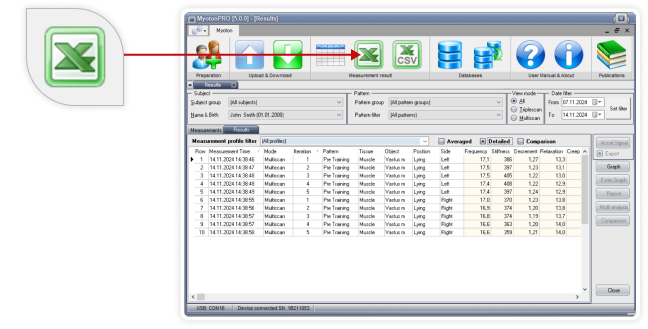
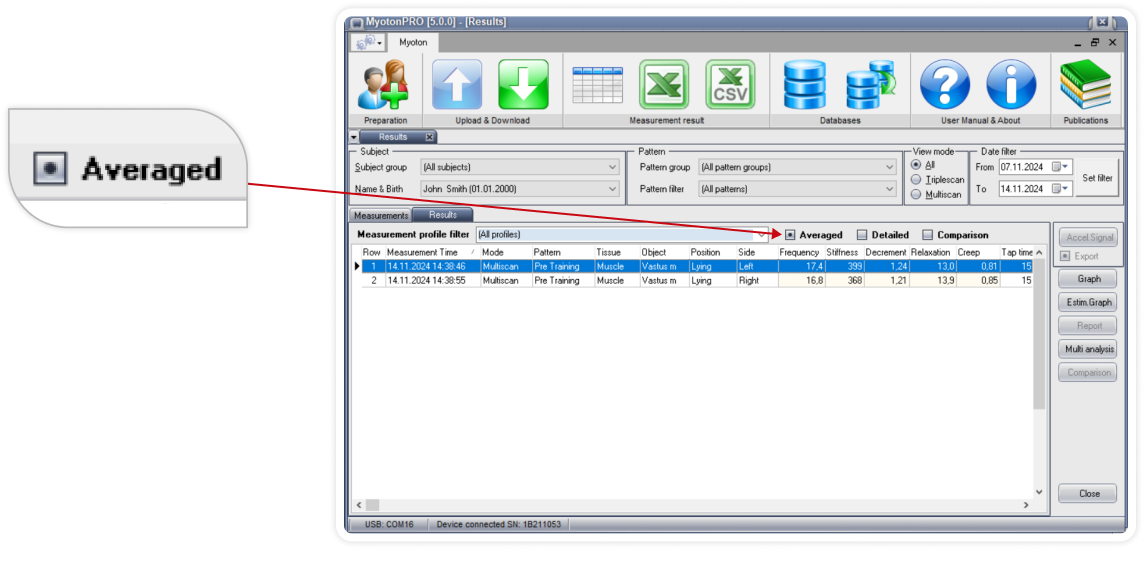
In the device, You will find the measurement results later under the selected Subjects and Patterns.

In the Software DOWNLOAD

  1. Connect the Device to the computer via USB.
  2. Click the green Download button in the toolbar to open the Device download window.
  3. In the Device download window, click Download to transfer the measurement results from the Device to the Software.

In the Result window, you can switch the measured results between an average and a detailed view.

In the Software DATA EXPORT

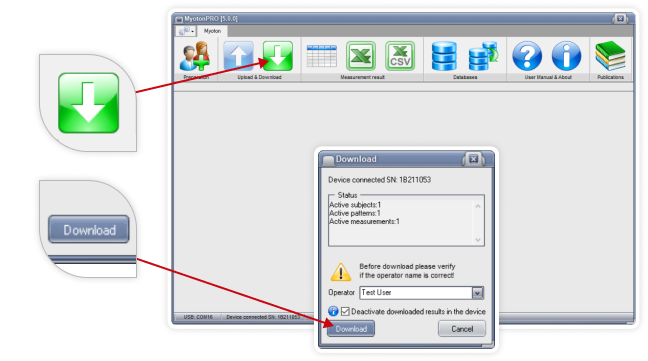
Export results from the Software as raw data for statistics, data visualisation, and reports.

Ensure that Microsoft Excel for Windows is installed on your computer.